
![]()

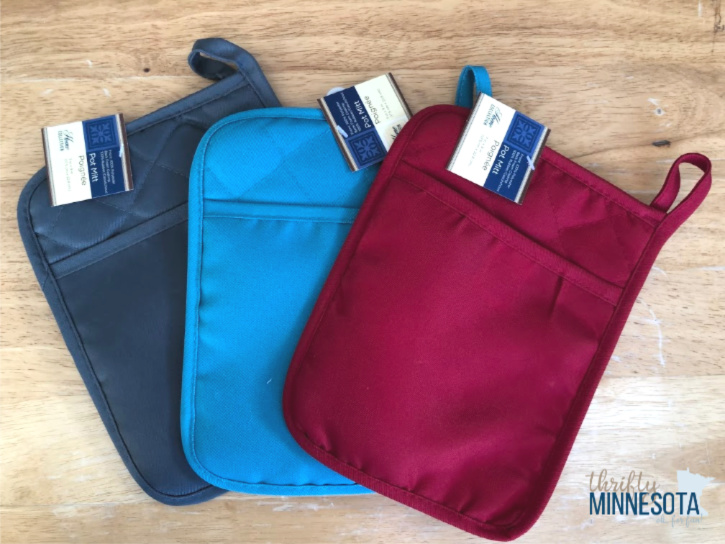
If a friend or relative living in another state has ever tried to tell you “It’s called a casserole,” you can proudly declare what we know to be the truth when you make this “Time for Hot Dish” Potholder!
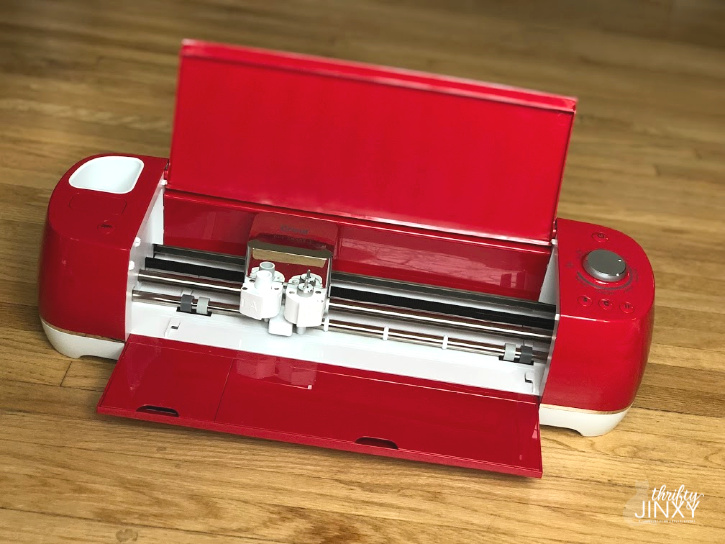
I have been having a lot of fun getting creative with my new Cricut Explore Air 2 and decided it was time to make some Minnesota-themed projects. What could be more Minnesotan than hot dish?
Before the holidays, I used the Cricut Explore Air 2 along with the Cricut EasyPress 2 to make a super cute Christmas potholder. It turned out great and was fun to make, so I decided it would be the perfect place to start for my first Minnesota-themed project.
To make these potholders, you can start with $1 pot holders from Dollar Tree. If you’re planning to give your pot-holder as a gift you can also grab a wooden spoon and a bottle of spices for $1 each and slide them inside the pot holder to make a more complete gift.
Here’s how you can make yours:
Hot Dish Potholder Gift
Tools and Supplies:
Pot Holder
Cricut Everyday Iron-on (I used white.)
Hot Dish Potholder Design
Cricut Explore Air 2
Cricut Weeder (Helpful but not obligatory.)
Optional Gifts for in your potholder – wooden spoon or spices + ribbon to decorate
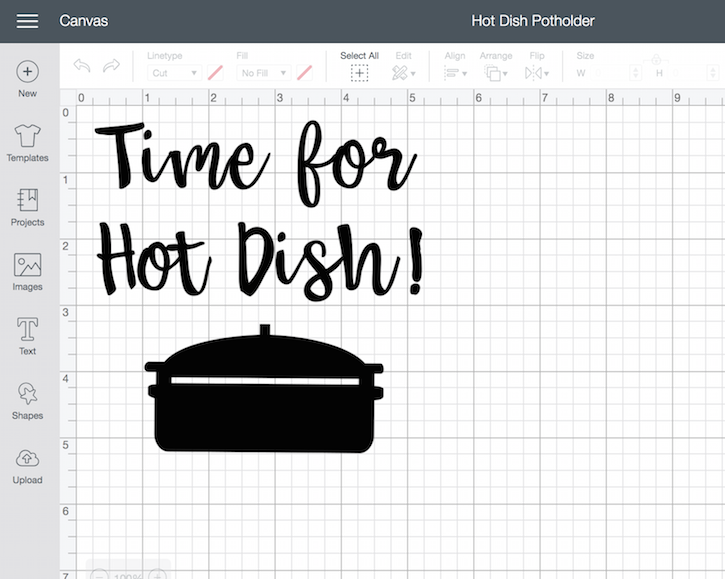
Start by making your design in Cricut Design Space. If you like my design, you can get it here. You can search and use one of the other pre-made designs, or create your own like I did. If you want to create a similar design, but with different words, the font I used is Babette.)
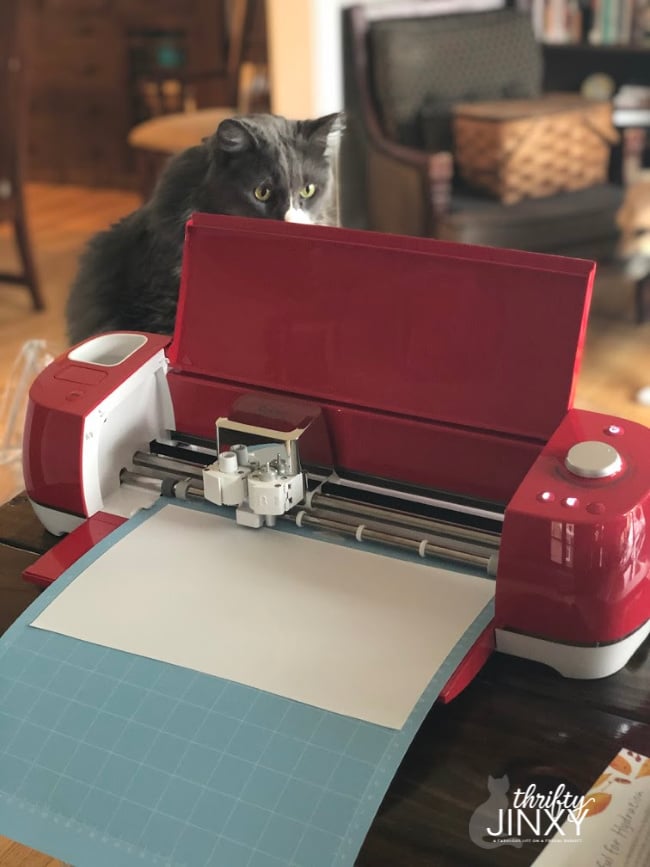
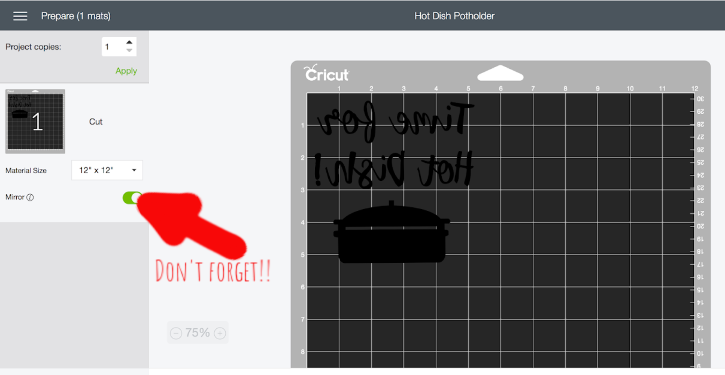
Load white iron-on into your machine and cut. Be sure to reverse your image before cutting!

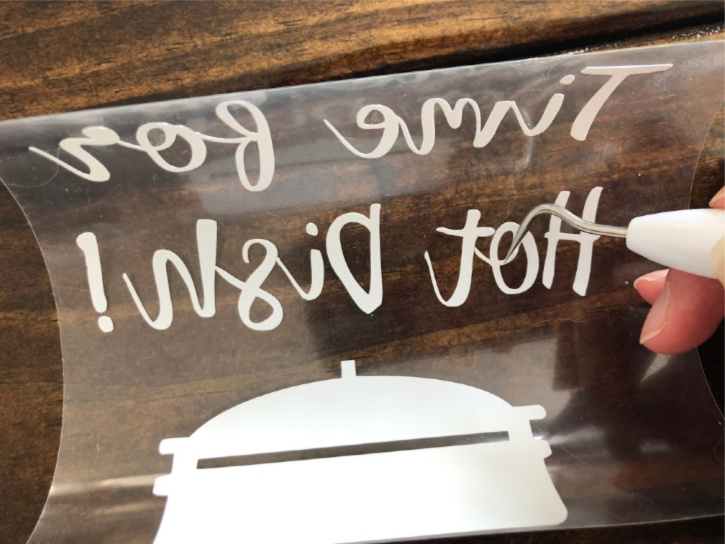
Once you have finished cutting, peel the backing away from your iron-on and weed out any remaining material.
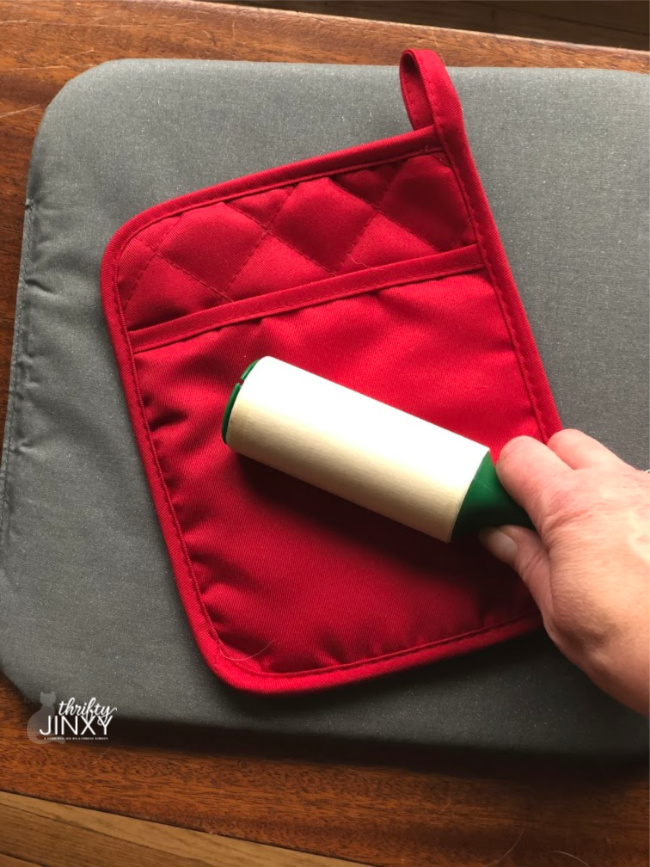
To prepare your pot holder for application, clean it with a lint roller. This is particularly important if you have cats invading your crafting area like I do.
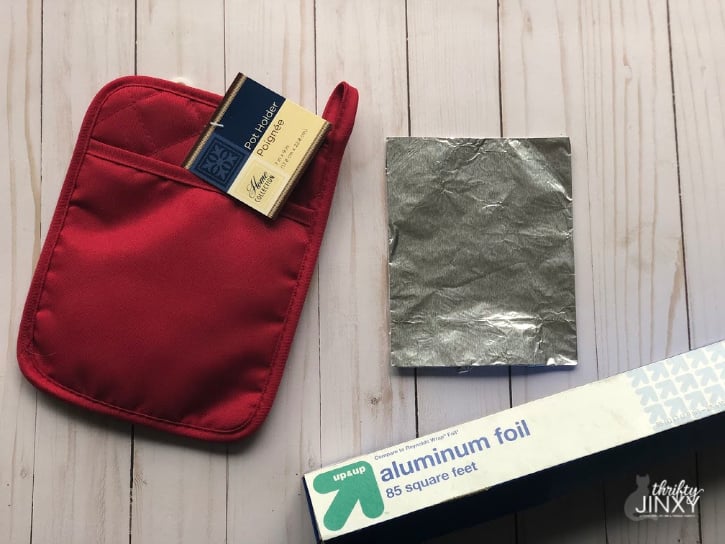
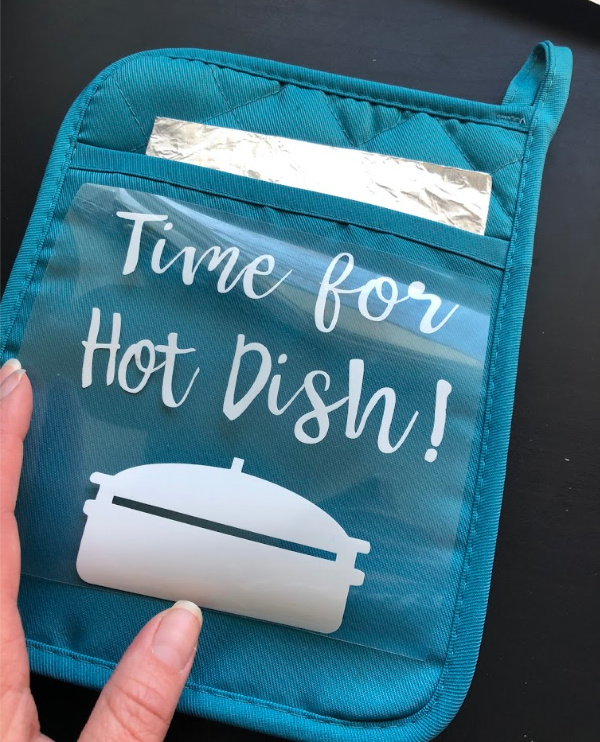
As iron-on application usually recommends pressing a bit on the back side as well a the front but this isn’t possible with a potholder that resists heat, I made a little workaround. I wrapped a small piece of cardstock in aluminum foil to tuck inside the pot holder so that the heat would be reflected a bit when pressing the front of the design. Place the prepared pot holder on an EasyPress Mat (recommended) or on top of a folded up towel.
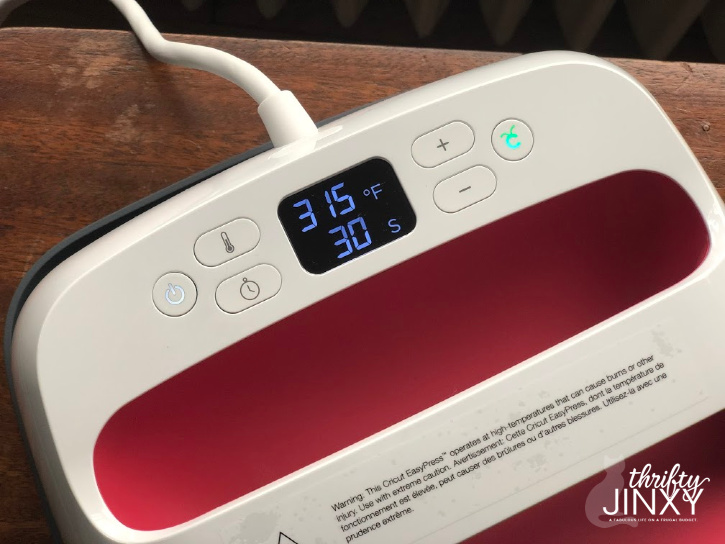
Now it’s time for the Cricut EasyPress 2. To get the correct temperature and time setting I referred to the EasyPress Heat Guide. For this polyester pot holder, set the temperature to 315° and the timer to 30 seconds and preheat.
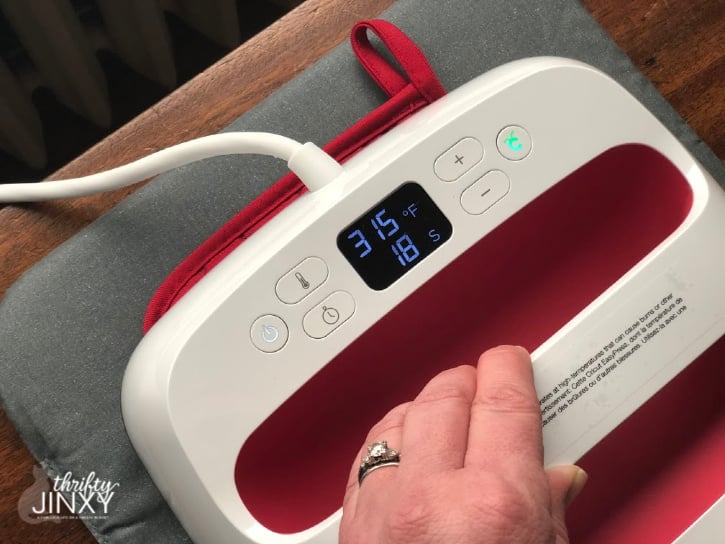
Once it has reached temperature, preheat the pot holder for 5 seconds. Place iron-on face down on pot holder, liner side up. Press with light pressure at 315°F for 30 seconds.
Slowly remove the liner while it is still warm. While removing, test to make sure everything is sticking and, if not, heat for another 5-10 seconds.

That’s it! Now all you have to do is fill your potholder with some goodies and prepare to make someone happy with this fun gift.
You can find lots more information about the Cricut Explore Air 2 and my other Cricut projects HERE.

- About the Author
- Latest Posts

Hi, I’m Chrysa, the owner and editor of ThriftyMinnesota.com. I’m here along with my friends Hannah and Laura to share fun and thrifty ways for you and your family to enjoy all the awesome things Minnesota has to offer!


Leave a Reply